2020. 11. 28. 17:02ㆍ개발/Node & Javascript
1. 개요
새로운 회사로 가게 되면서 Nest.js를 활용하게 되었다.
이에 따라서 Typescript도 덩달아 배워보게 되었는데, 이전과는 다른 발전된 framework의 형태와 aop 기반의 spring과 유사한 모습을 보이는 것을 보고 놀랐다. 그래서 이를 테스트 및 셋업하는데 있었던 일들과 개인적인 소감을 공유하려고 한다.
2. Core concept
Nest.js의 소개 문서에서 보면 아래와 같이 설명하고 있다.
A progressive Node.js framework for building efficient, reliable and scalable server-side applications.
즉 server-side application을 만드는데, 쉽고 빠르고, 확장성있게 개발할 수 있게 해주는 framework로 보인다.
그렇다면 기존에 있던 express 등과 어떻게 다른지 어떤 핵심 concept가 있는지 살펴보자
- Typescript 지원
- Nest.js의 기본적인 언어는 typescript이다.
- 이는 빌트인 된 모듈을 통해서 쉽게 typescript로 개발을 할 수 있게 도와준다.
- Typescript를 통해서 기존의 javascript의 에러 구문들을 compile time에 잡을 수 있고, 또한 쉽게 module화 ( 요즘은 잘 되긴 하지만.. )해서 개발을 진행할 수 있을 것으로 보인다.
- Express, Fastify 등등의 다양한 web server framework들을 backend로 지원 가능하다.
- 기본적으로는 express를 지원하나, fastify도 따로 설치해서 셋업이 가능하다.
- 구조 자체가 framework independent하게 설계하기 위해서 많은 노력이 있었던 것 같다.
3. Start Project
백문이 불여일타라고 했다. 직접 가이드에 나와있는 documentation을 보고, 따라 해보자.
아래의 개발은 다음과 같은 환경에서 진행 되었다.
- OS: Mac 10.15.7
- Node: v10.20.1
- NPM: 7.0.8
- nest.js: 7.0.0
먼저 프로젝트 생성을 진행해보자.
npm i -g @nestjs/cli #install nest cli package
그리고 프로젝트를 생성해보자.
nest new $PROJECT_NAME
해당 방식으로 생성하면 아래과 같은 구조의 앱을 볼 수 있을 것이다.

그렇다면 각각의 code들을 살펴보도록 하자.
3.1. main.ts
import { NestFactory } from '@nestjs/core';
import { AppModule } from './app.module';

async function bootstrap() {
  const app = await NestFactory.create(AppModule);
  await app.listen(3000);
}
bootstrap();
다음과 같이 Application을 bootstrap하는 코드가 담겨져 있다.
기본적으로 http framework로 express를 지원하며, fastify 모듈도 지원한다.
3.2. app.module.ts
import { Module } from '@nestjs/common';
import { AppController } from './app.controller';
import { AppService } from './app.service';

@Module({
  imports: [],
  controllers: [AppController],
  providers: [AppService],
})
export class AppModule {}
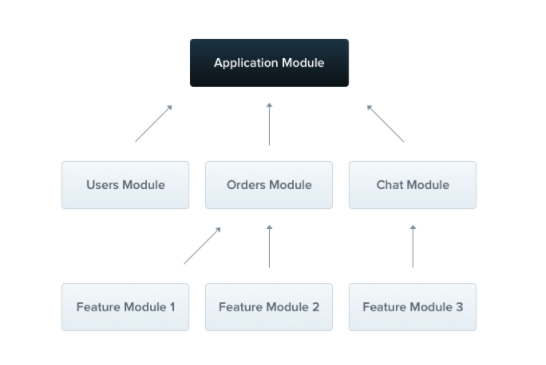
기본적으로 Nest.js는 다음과 같이 모듈로 기능을 분해할 수 있다.
가장 기본적으로 application 모듈 ( root module )이 존재하고, 다른 module을 import하는 형식으로 쓴다.
component를 구조화 하기 위해 사용된다.

3.3. app.controller.ts
import { Controller, Get } from '@nestjs/common';
import { AppService } from './app.service';

@Controller()
export class AppController {
  constructor(private readonly appService: AppService) {}

  @Get()
  getHello(): string {
    return this.appService.getHello();
  }
}
Routing을 담당한다. 기본적으로 spring boot의 annotation과 상당히 유사한 것을 볼 수 있으며 service object를 injection해서 사용하는 것을 볼 수 있다.
3.4. app.service.ts
import { Injectable } from '@nestjs/common';

@Injectable()
export class AppService {
  getHello(): string {
    return 'Hello World!';
  }
}
Business logic을 처리하기 위한 layer다. spring boot의 component와 유사하게 bean을 생성해서 injecting이 가능한 형태로 되어 있는 것을 볼 수 있다.
4. Debug
필자는 Visual studio code 환경에서 개발 및 테스트를 진행했고, 이를 위해서 visual studio project setup을 다음과 같이 진행하였다.
4.1. .vscode setup
projectFolder/.vscode/launch.json 을 생성을 하고, 아래와 같은 설정을 넣는다.
{
    // Use IntelliSense to learn about possible attributes.
    // Hover to view descriptions of existing attributes.
    // For more information, visit: https://go.microsoft.com/fwlink/?linkid=830387
    "version": "0.2.0",
    "configurations": [
        {
            "type": "node",
            "request": "launch",
            "name": "Debug Nest Framework",
            "args": [
                "${workspaceFolder}/src/main.ts"
            ],
            "runtimeArgs": [
                "--nolazy",
                "-r",
                "ts-node/register",
                "-r",
                "tsconfig-paths/register"
            ],
            "sourceMaps": true,
            "envFile": "${workspaceFolder}/.env",
            "cwd": "${workspaceRoot}",
            "console": "integratedTerminal",
            "protocol": "inspector",
            "runtimeExecutable": "node"
        },
        {
            "name": "Debug Jest Tests",
            "type": "node",
            "request": "launch",
            "runtimeArgs": [
              "--inspect-brk",
              "${workspaceRoot}/node_modules/.bin/jest",
              "--runInBand",
              "--coverage",
              "false"
            ],
            "console": "integratedTerminal",
            "runtimeExecutable": "node"
          },
          {
            "name": "E2E test",
            "type": "node",
            "request": "launch",
            "runtimeArgs": [
              "--inspect-brk",
              "${workspaceRoot}/node_modules/.bin/jest",
              "--runInBand",
              "--coverage",
              "false",
              "--config",
              "${workspaceRoot}/test/jest-e2e.json",
            ],
            "console": "integratedTerminal",
            "runtimeExecutable": "node"
          }
    ]
}
이렇게 하면, debugging, tc, e2e test까지 확인이 가능하다.
4.2. Debugging

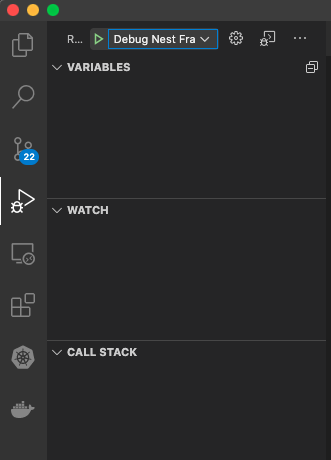
셋업이 끝났다면, 다음과 같이 좌측의 debugging 탭에 들어가서 상단의 초록색 play button을 실행하면 쉽게 debugging mode를 실행할 수 있다.
시작하기 전에 간단하게 다음과 같이 break point를 찍어보자.

그리고 debugging mode를 실행한다.
그 후 정상적으로 로드가 되었다면, http://localhost:3000에 접근해본다.

혹시라도 아래와 같은 에러가 발생한다면, 로그 설명대로 npm install @nestjs/platform-express --save를 통해서 설치해주면 된다.
[Nest] 70415 - 2020-11-28 4:49:38 PM [PackageLoader] No driver (HTTP) has been selected. In order to take advantage of the default driver, please, ensure to install the "@nestjs/platform-express" package ($ npm install @nestjs/platform-express).
5. 후기
첫 글을 쓰다보니 글을 쓰는게, 정리하는 것보다 시간이 더 걸린다. 그래도 한 번 적으면서 쉽게 정리가 되는 것 같다.
느낀점은
- 기존 web appllicatoin 및 aop 기반의 spring boot application과 유사한 점이 많아서, 쉽게 구조 파악이 가능했다.
- 좀 더 살펴봐야하겠지만 기본적인 프로젝트 셋팅이 매우 쉽게 잘되어 있어서 사용하기 편했다.
다음에는 직접 몇가지 설정을 만져보면서 좀 더 자세한 스펙을 살펴보려고 한다.
6. 출처 및 참고 자료
Nest.js official site - https://nestjs.com/
NestJS - A progressive Node.js framework
NestJS is a framework for building efficient, scalable Node.js web applications. It uses modern JavaScript, is built with TypeScript and combines elements of OOP (Object Oriented Progamming), FP (Functional Programming), and FRP (Functional Reactive Progra
nestjs.com
debugging nest.js in vscode - medium.com/javascript-in-plain-english/debugging-nestjs-in-vscode-d474a088c63b
'개발 > Node & Javascript' 카테고리의 다른 글
| Nest.js 탐험기3 - cache를 써보자 (3) | 2021.01.20 |
|---|---|
| Nest.js 탐험 2 - Filter를 등록해보자. (1) | 2021.01.16 |
| Node.js event loop 정리해보기 (2) | 2021.01.03 |
| ECMA 2020 Changes (3) | 2020.12.17 |
| Nest.js 탐험 2 - API 작성해보기 (4) | 2020.12.13 |